This section is setup to provide Keith's rail kit users some general
instructions for installing their kit. Please keep in mind this is only
a suggested setup and there are many other ways to setup your rails and
fuel system. Your car setup may vary and have different requirements than
what is listed here. If you have any questions feel free to e-mail
them (please provide picture when possible for specific questions). This
section is divided into 3 sections to segment the installation process.
All tools, parts, and estimated times are included in this writeup for
the pictured setup. The sections of this write-up are:
This How-to assumes you already have your manifold and stock rails removed
and that your fuel system has already been designed to accomidate these
rails. Other "how-to" write-ups are available for manifold
removal and fuel
system setups on the web.
| Part I - Assembling the Rails |
|
|
Tools
required
Large adjustable wrench
3/4 " open/boxed end wrench
1/8 " Allen wrench
Teflon Tape
Medium size Flat Head screwdriver
3/4 " Deep Socket and Socket Driver |
Parts Required
1-Keith's Rail Kit (cost $215 )
2-4 x 3/8 " NPT fittings (recommended 3 x AER-FCE2005
and 1 x AER-FCE2035 for those doing 6AN lines and nickel finish
fittings as pictured) (approx cost $35)
|
Estimated Time
15 minutes |
|
|
|
|
|
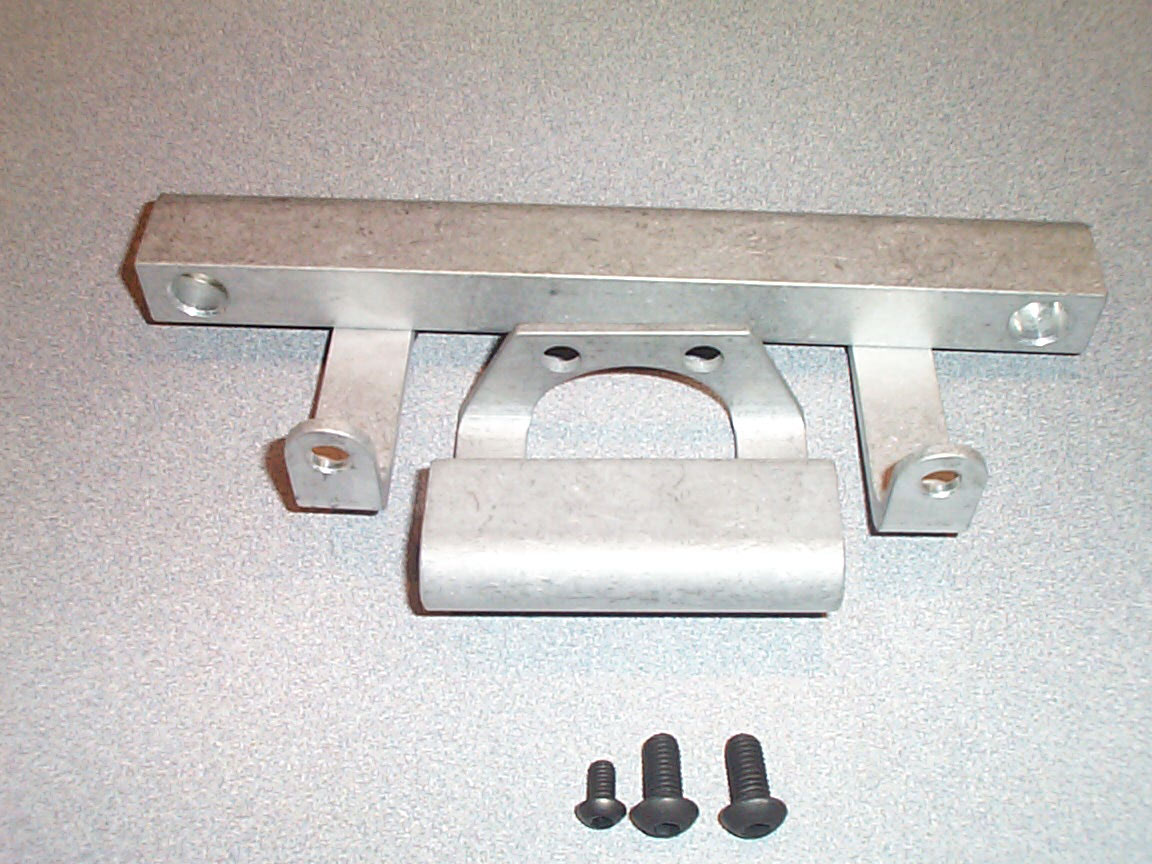
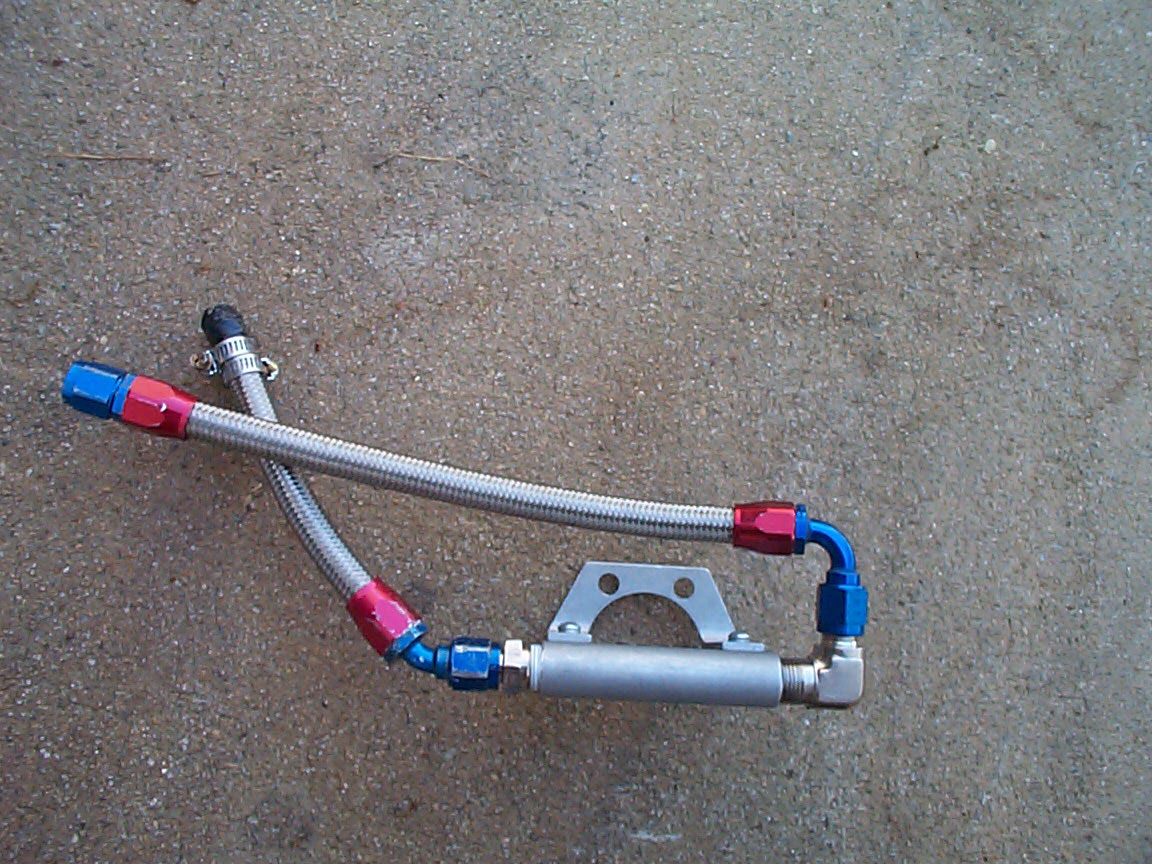
Rail kit pictured as shipped. Click on
picture for larger image. |
|
| See primary rail pictured
on Step 3. |
Step 1. Reverse primary mount using flathead
screwdriver. |
|
| no picture available at
this time. |
Step 2. Tighten all screws on secondary
rail using flathead and 1/8" allen wrench. |
|
|
|
Step 3. Put desired 3/8 " NPT fittings
on rails using PTFE Thread sealant tape (teflon). Pictured incorrectly
to left - note red "X" where wrong fitting intially used
- ended up using AER-FCE2035 instead (click on image for full size
picture). When choosing the fittings keep in mind that the clearance
between the front of the primary rail and the front secondary injector
is tight and requires at least a 45 degree NPT fitting. Teflon tape
should be used on all NPT fittings but not on AN fittings. Make sure
not to tighten the secondary fittings too far - it is possible to
block the injector inlet (although getting it that tight would take
a huge amount of force). |
|
| |
|
| Part II - Harness Replacement (for low
impedance injectors) |
|
Tools Required
Diagonal Snips
Wire strippers
Soldering Iron / Solder
Heat Shrink
Lighter
|
Parts
Required
1. 4 x Injector Harness (Pictured - GM Multi-port Fuel Injector
Socket Calterm Part #08653) (approx cost $6)
2. 4 x 10 ohm, 10 watt resistors (Radio Shack Part # 271-132)
(approx Cost $5)
|
Estimated Time
45 minutes
|
|
|
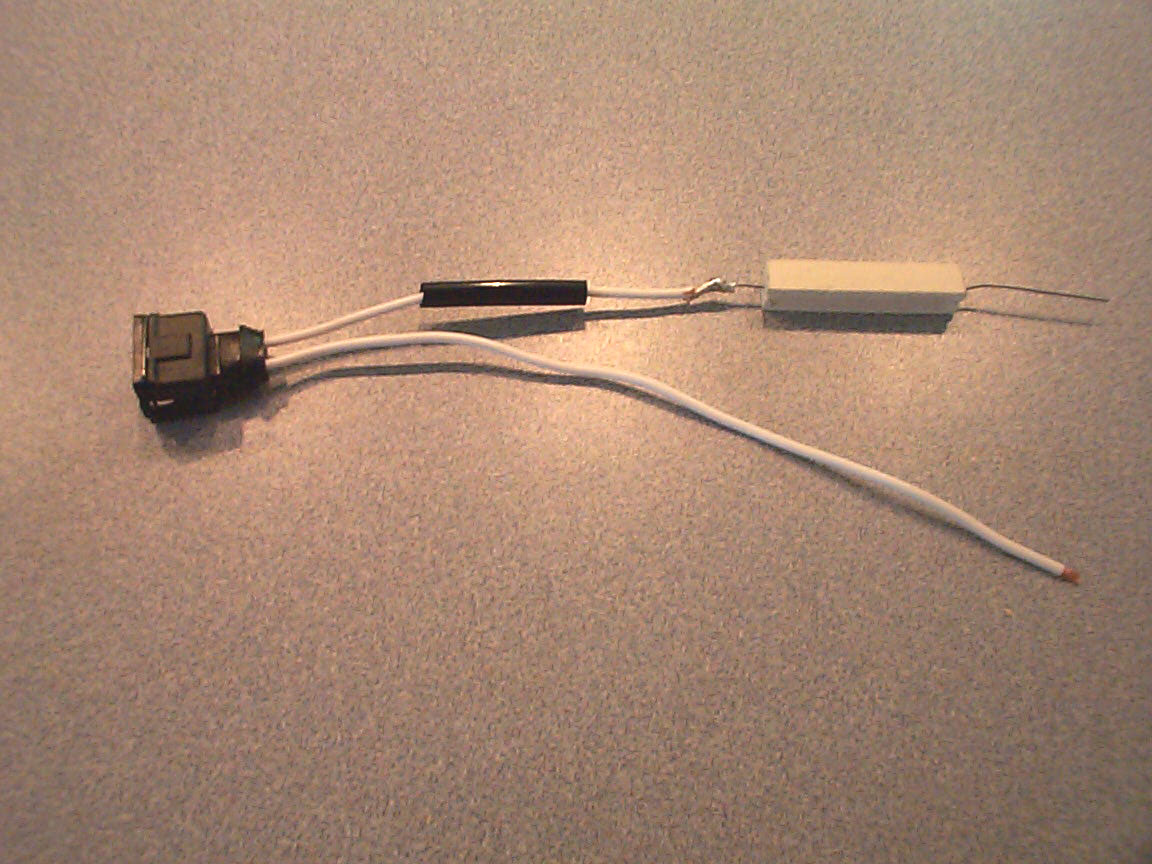
Step 1. Snip one wire of the harness back
to fit as pictured. (does not matter which wire) |
|
|
|
Step 2. Place heat wrap on short wire.
Strip the short wire. Loop wire and resistor together and solder.
Cover solder connection with heat wrap and melt with lighter. |
|
|
|
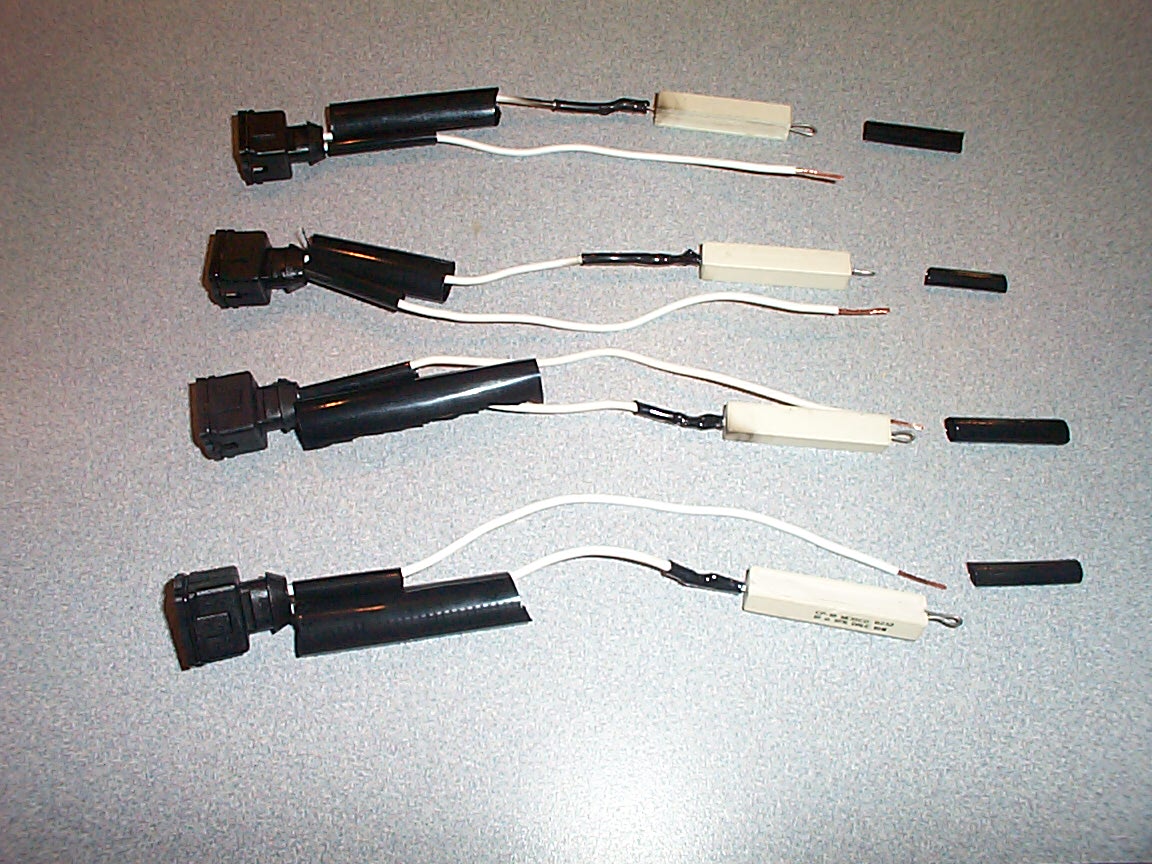
Step 3. Repeat Step 1 and 2 for all harnesses. |
|
| |
Step 4. Loop ends of resistors and setup
heat shrink. (as pictured in step 3. |
|
|
|
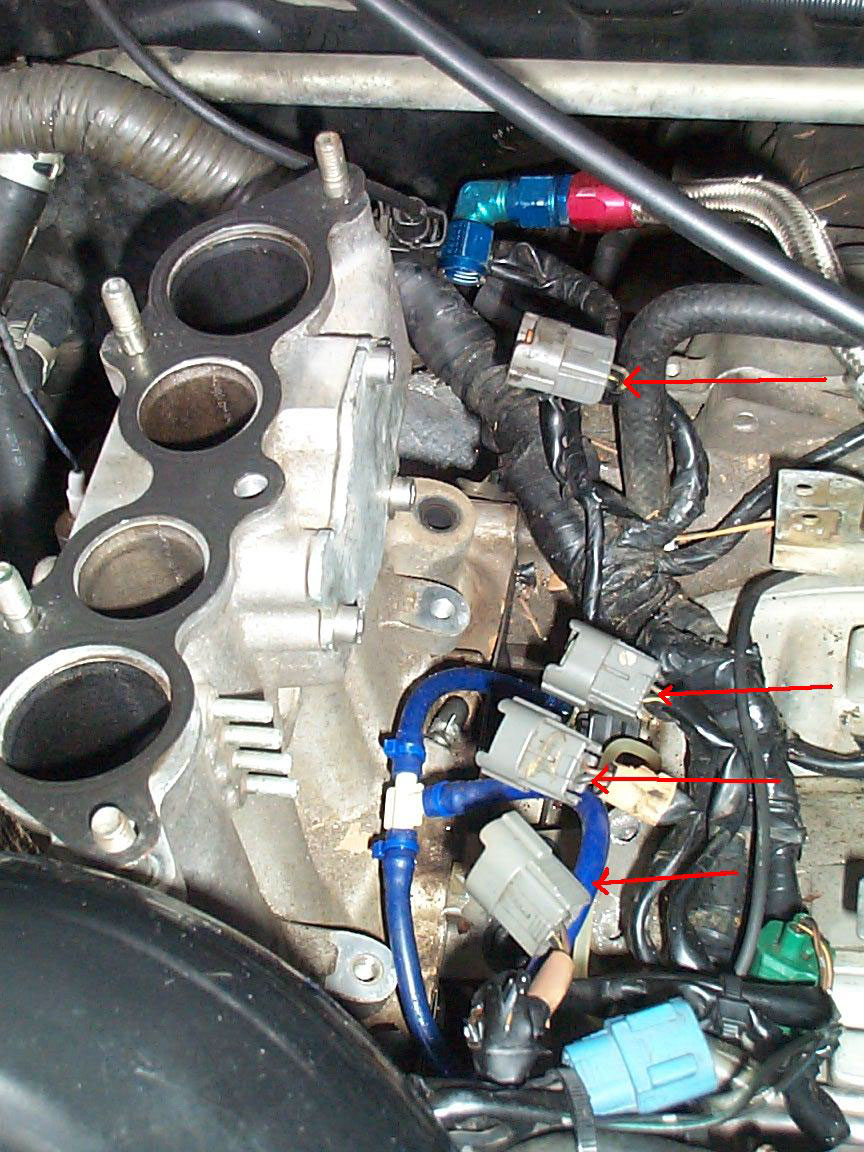
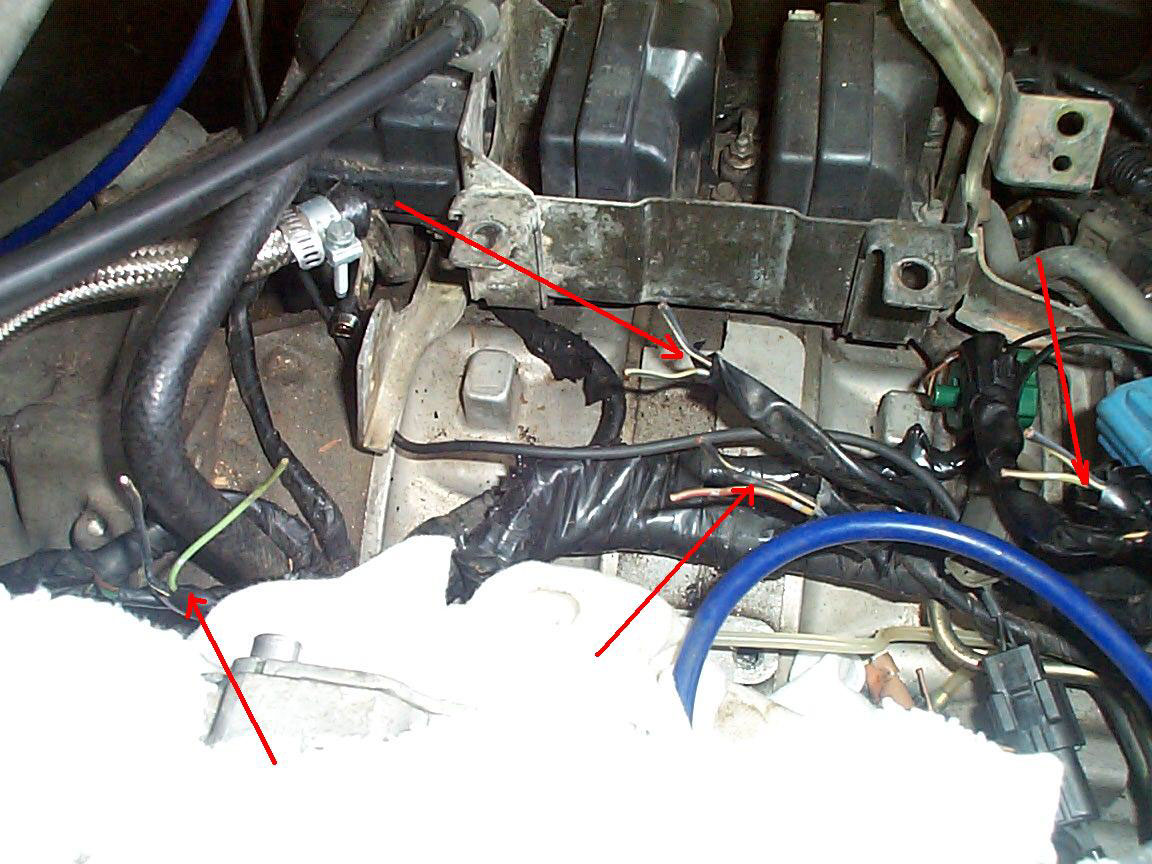
Step 5. Snip stock harnesses from engine
harness. Shown by red arrows (click on picture to left for full size
pictures). |
|
|
|
Shown snipped. |
|
| |
Step 6. Solder new harness into engine
harness and cover with heat wrap and melt. Does not matter which wire
to which. |
|
| |
|
|
| Part III - Rail Installation |
|
|
|
Tools Required
1/8 " Allen wrench
? Allen wrench
? Allen wrench
Razor Blade
11/16 " Open end wrench
3/4 " Open end wrench
|
Parts Required
1. Connectors to fuel system (6AN to auto-fit installed on
stainless pictured)
2. 5/8 " ID hose - about 5 inch length (cost approx $1)
3. 2 x 8mm x 30mm x 1.25 thread bolts (purchased from Lowe's
Hardware) (cost approx $3)
|
Estimated Time
30 minutes |
|
|
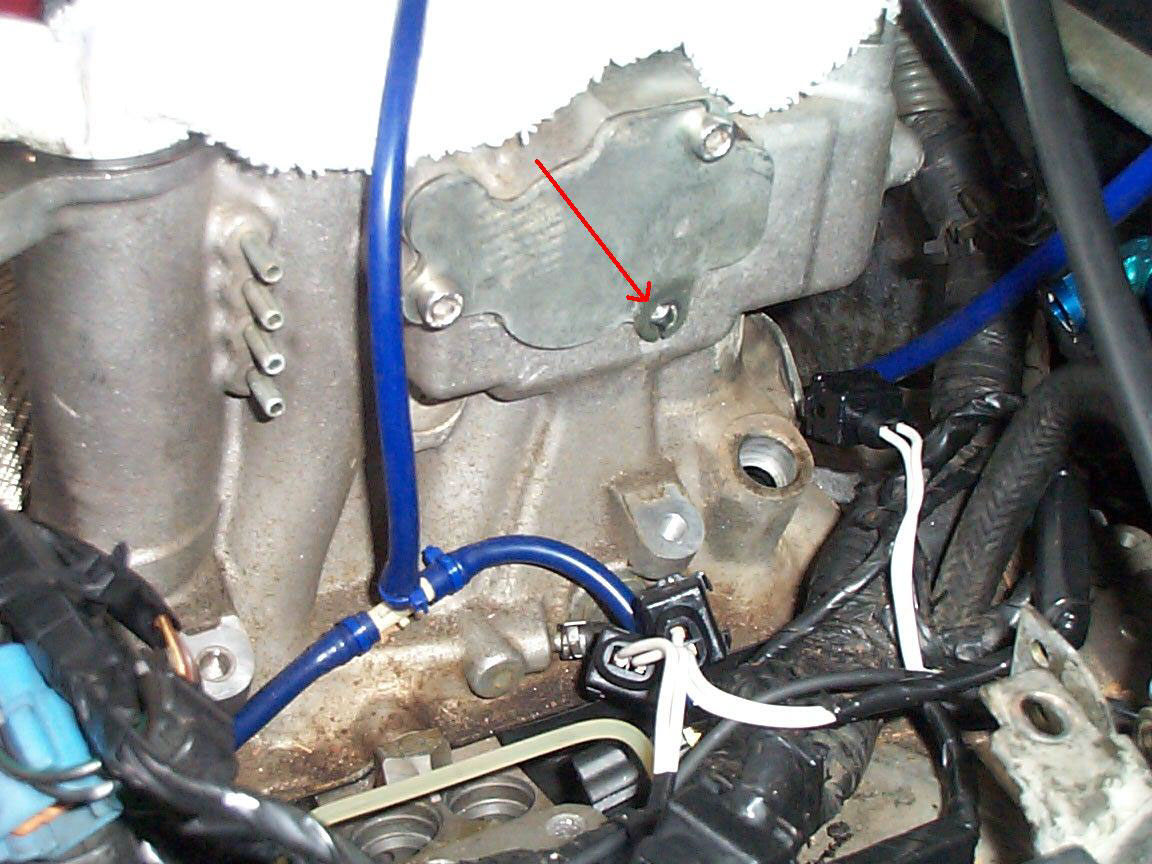
Step 1. Remove lower rear bolt for Block
off Plate on the inside of the lower intake manifold. Replace with
Hex bolt included in kit. |
|
| |
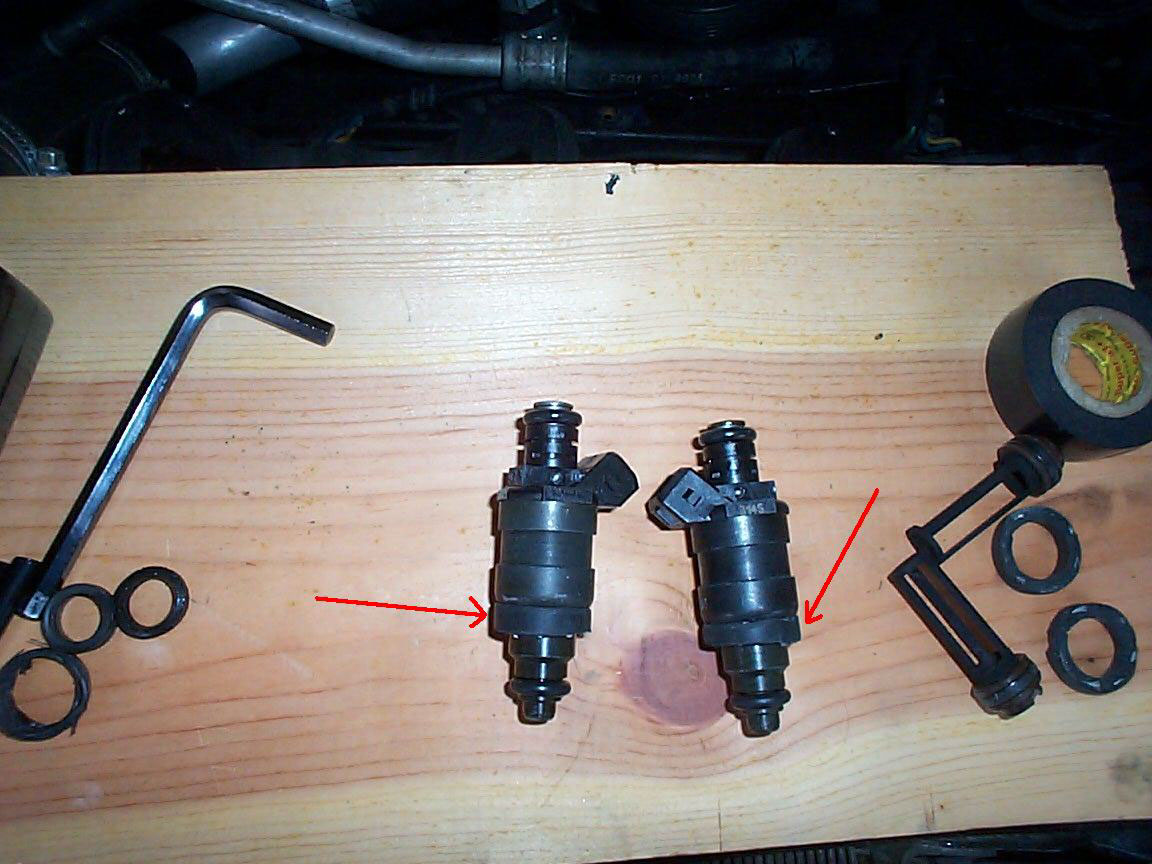
Step 2. Slightly lubricate top of secondary
injector o-rings with oil. Insert secondary injectors into secondary
rail. |
|
|
|
Step 3. Temporarily seat secondary rail
on lower intake manifold. Note the gap size left between bottom of
seated injector and the lower intake manifold. Cut a sliver of the
5/8" hose slightly larger than this gap to make custom insulator.
Remove rail/ leaving injectors in rail and install custom insulator
on both injectors (primaries pictured). |
|
| No picture avialable at
this time. |
Step 4. Connect fuel lines to secondary
rail (this may be required before rail installation depending on access
to both fittings after rail is in). Install secondary rail on to lower
intake manifold using remaining 2 hex bolts included with the kit. |
|
| |
Step 5. Slightly lubricate top of primary
injector o-rings with oil. Insert primary injectors into primary rail. |
|
| |
Step 6. Temporarily seat primary rail on
engine. Note the gap size left between bottom of seated injector and
the engine. Cut a sliver of the 5/8" hose slightly larger than
this gap to make custom insulator. Remove rail/ leaving injectors
in rail and install custom insulator on both injectors. |
|
|
|
Step 7. Connect fuel lines to primary rail
(this may be required before rail installation depending on access
to both fittings after rail is in). Install primary rail on to engine
using remaining 2 8mm bolts (original bolts are too long to use with
new rails). |
|
|
|
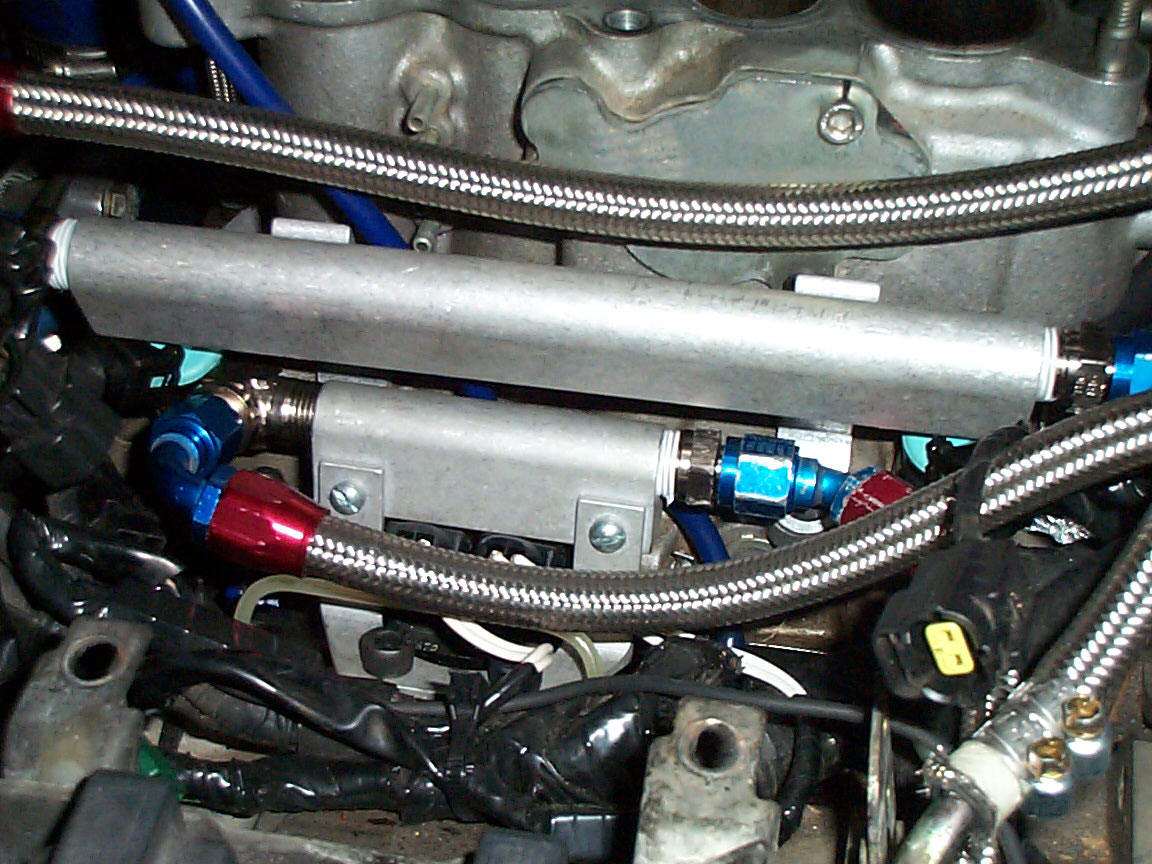
Picture of completed installation. |
|
